
SITE CONTENTS
LOCATION MAP
MEASURED DRAWINGS
TEACHER'S CORNER
ARCHITECTURAL
INFORMATION
DESIGN TEAM
HOME
 |
|
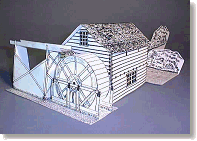
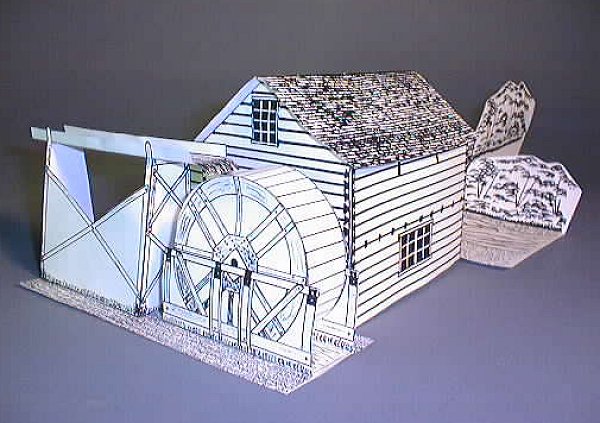
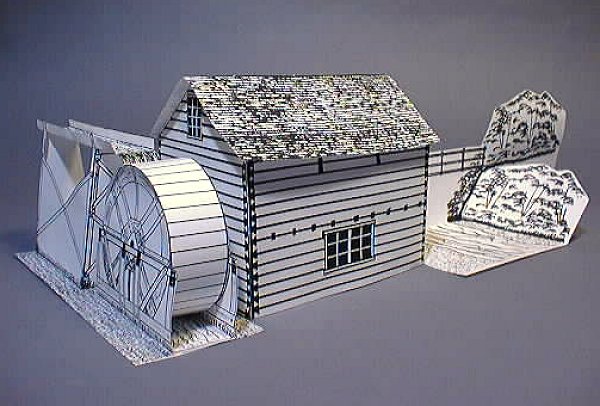
| Create a three-dimensional building model replica of the Grist Mill at keremeos B.C.
Follow instructions precisely as indicated. |
 |
- SUPPLIES
- Scissors
- Glue Stick
INSTRUCTIONS
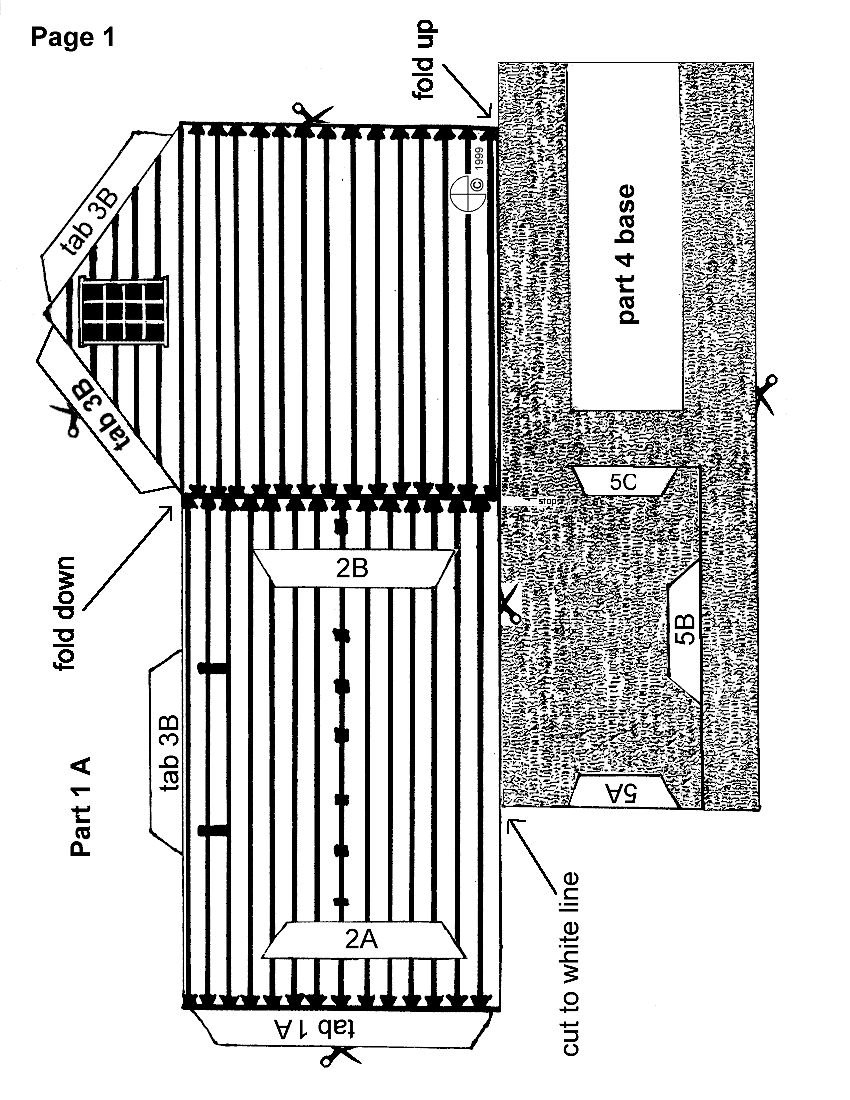
- Begin by printing all six pages on regular or thick paper.
- Proceed to cut out parts in order starting with page 1 and fold lines and tabs down.
- Then glue parts together to create a three-dimensional model.
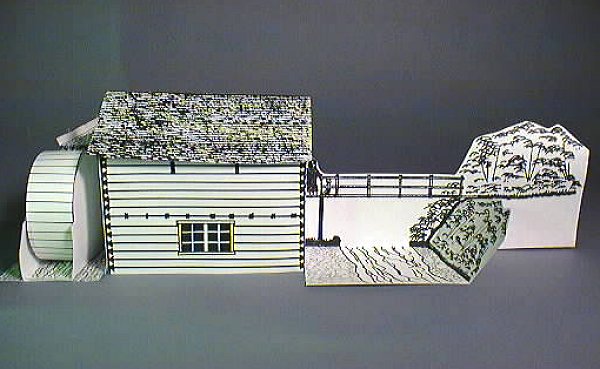
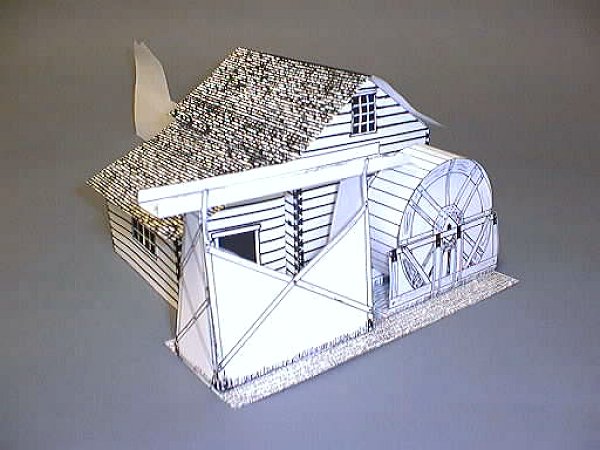
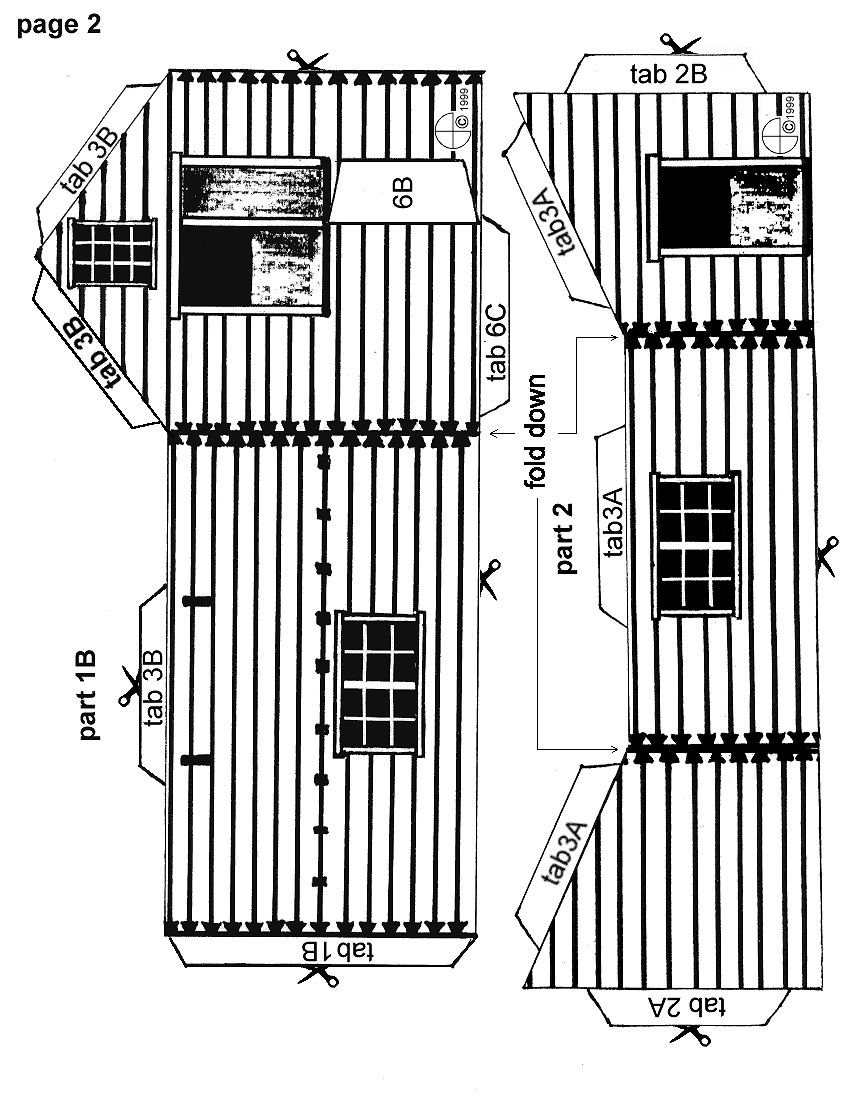
Part 1 - Main Building Structure
- Cut out part 1A and 1B.
- Make sure to follow instructions on part 1 to stop cutting at marked white line
- Put main building walls together by using tabs 1A and 1B.
Part 2 - Addition
- Cut out part 2.
- Glue tabs 2A and 2B to their marked locations 2A and 2B on main structure.
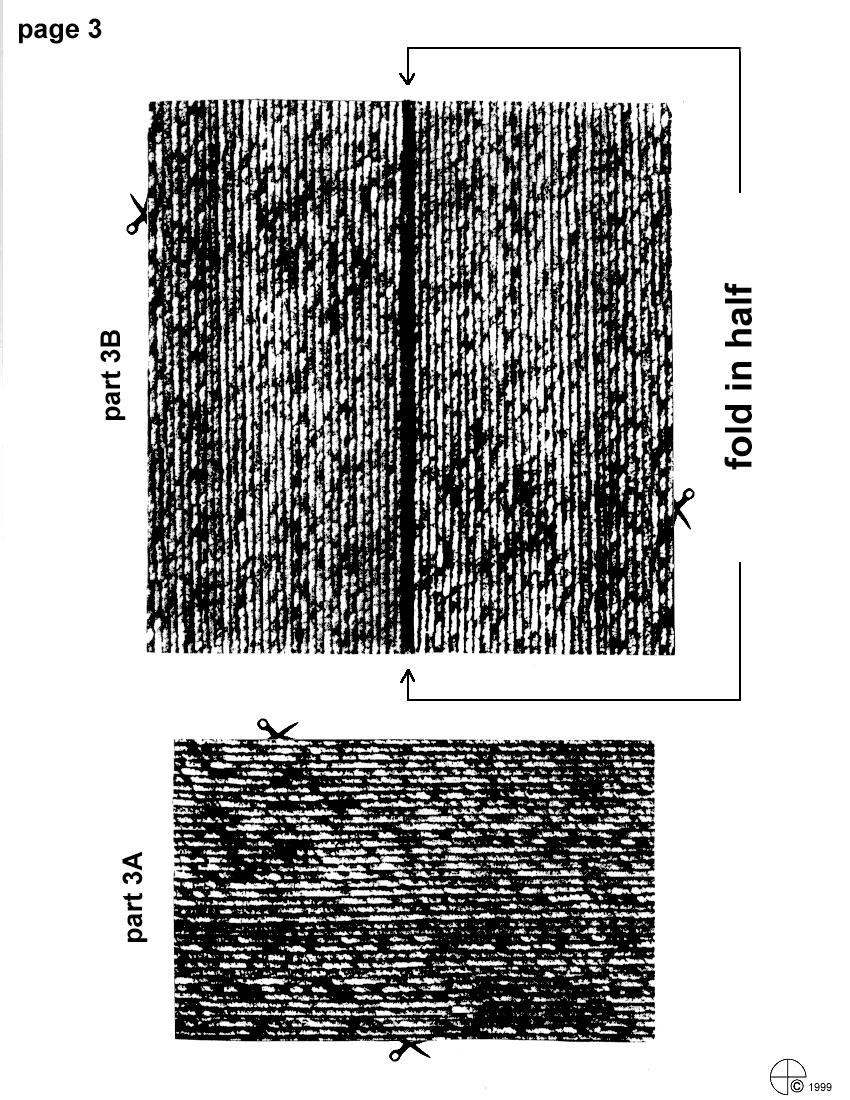
Part 3 - Roofs
- Cut out part 3A and glue onto tabs labelled 3A.
- Fold part 3B in half and glue onto tabs labelled 3B.
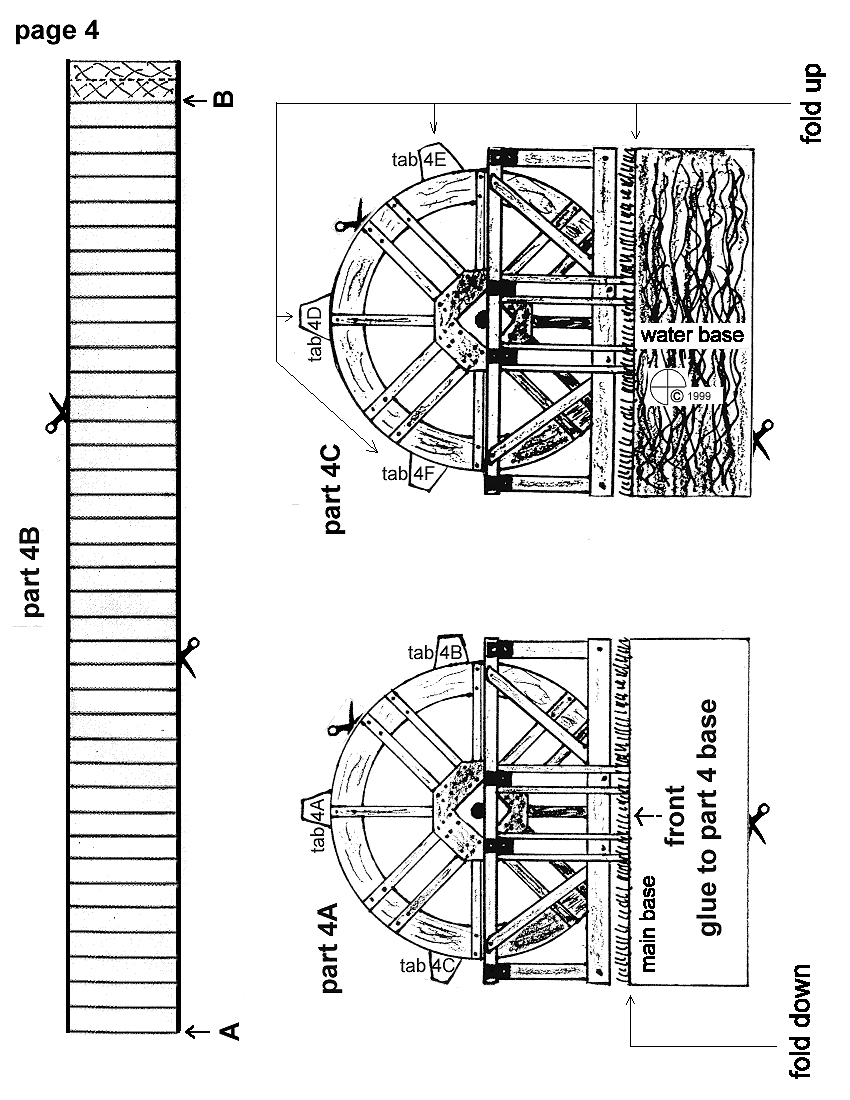
Part 4 - Water Wheel
- Cut out parts 4A, 4B and 4C.
- Part 4A - Fold main base and tabs 4A, 4B and 4C down.
- Part 4B - Make a circle by glueing line A to line B.
- Part 4C - Fold water base and tabs 4D, 4E, and 4F up.
- Put together water wheel by glueing tabs 4A, 4B and 4C to inside of part 4B (the wheel).
- Next, take part 4C with tabs folded up and glue to inside of wheel.
- Then glue water base over top of main base.
- Then glue part 4 (water wheel) to the space marked part 4 base.
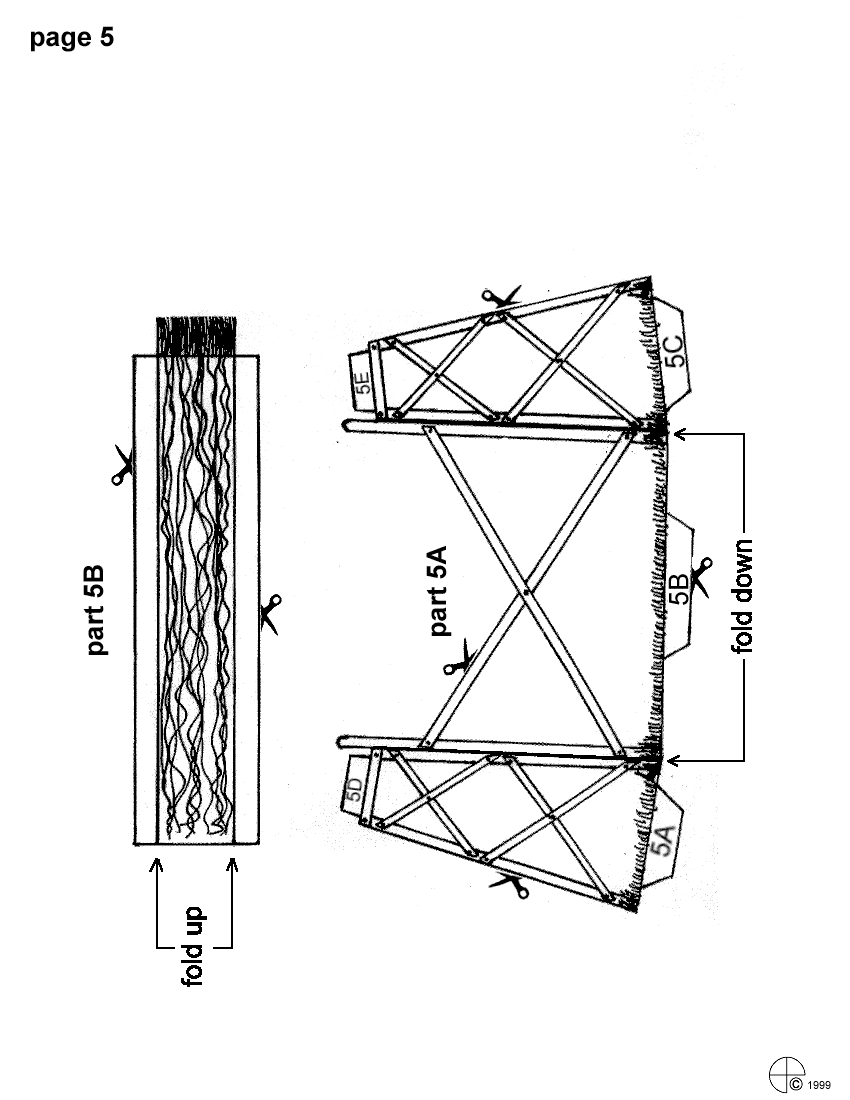
Part 5 - The Flume and it's supports.
- Cut out and fold all tabs and lines down.
- Glue tabs 5A, 5B and 5C to to their marked locations 5A, 5B and 5C behind water wheel.
- Take part 5B (the flume) and glue onto tabs 5D and 5E.
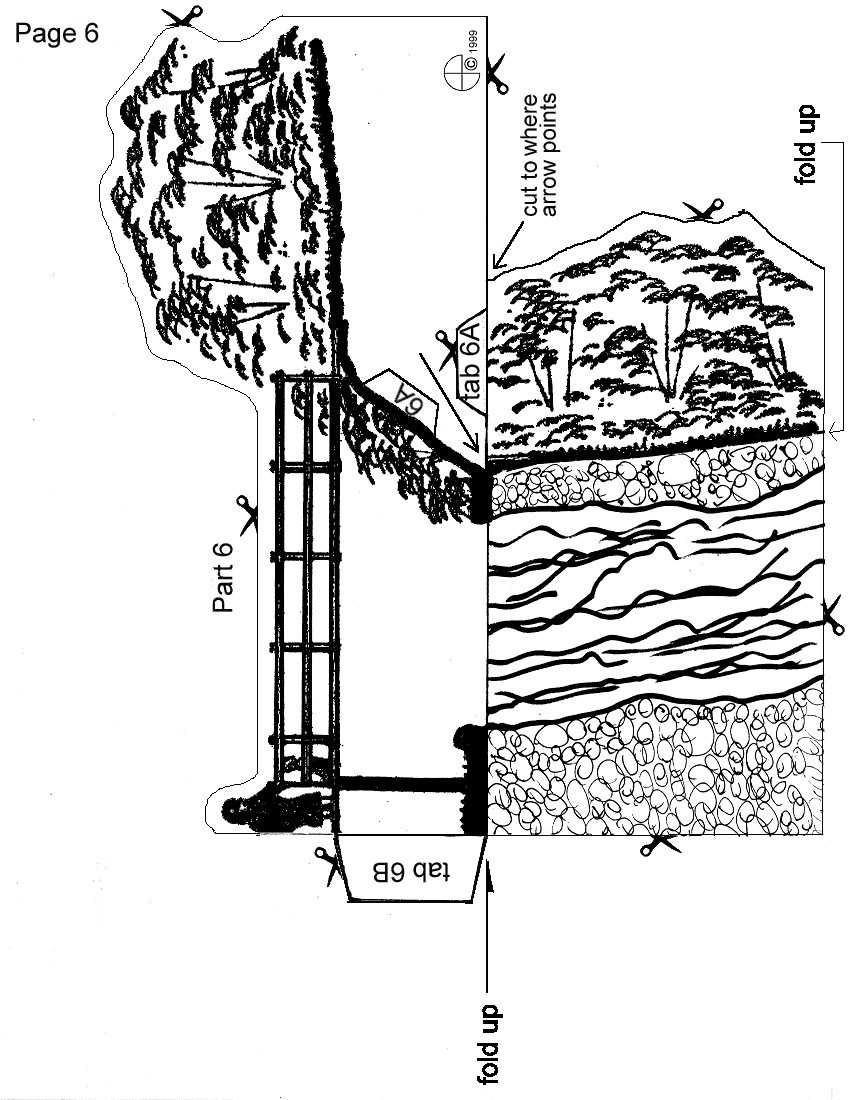
Part 6 - Bridge and Creek
- Cut out shape where marked.
- Fold lines up and then fold tabs down.
- Make sure to cut around Tab 6A to where arrow points then stop.
- Glue tab 6A to it's marked location 6A.
- Secure part 6 to main structure by glueing tab 6B to it's marked location 6B.
- And also by glueing tab 6C to the underneath side of part 6.
Now It's your turn. Go to it!
|
|